조금더 복잡한 만능리모컨 설계
-우리가 6-1에서 만들었던 간단한 만능리모컨 프로토타입이 마음에 들었는지, 이번에는 업체에서 좀더 복잡한 만능리모컨 을 설꼐해달라고 부탁했다.
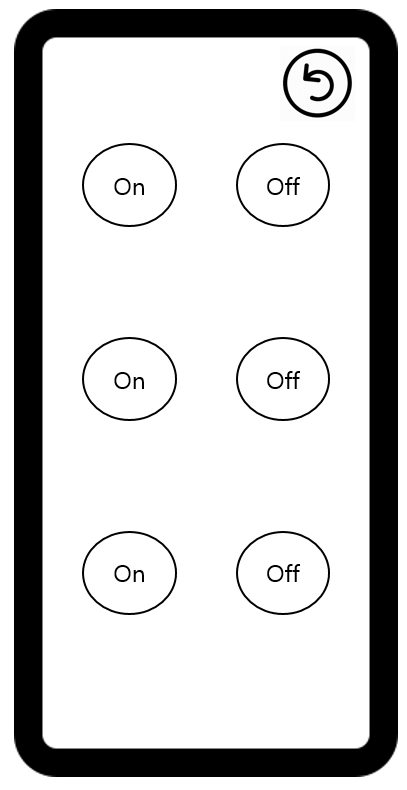
- 위와같이 3쌍의 On/Off 버튼이 있는 만능리모컨을 만든다고 가정해보자,
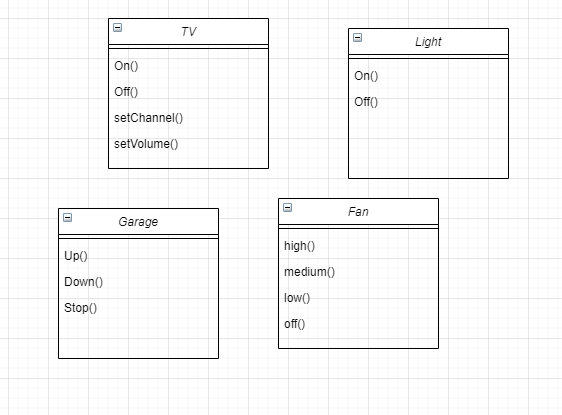
- 우리는 먼저 테스트용도로 이 리모컨에 GarageDoor, CDplayer, Light 를 제어해보기로 했다.

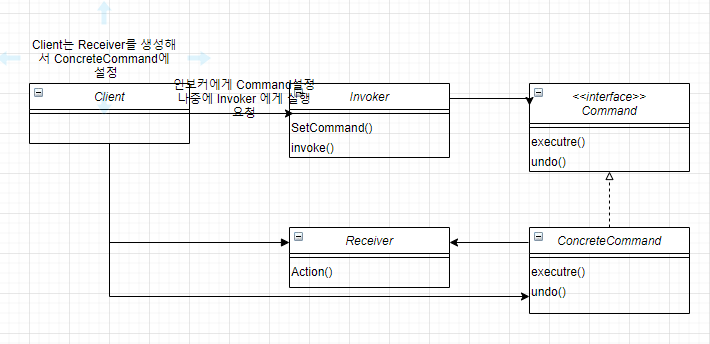
- 가장먼저 Inovoker에 해당하는 리모컨부터 객체로 디자인해보자.
public class RemoteControl {
	Command[] onCommands;
	Command[] offCommands;
	Command undoCommand;

	public RemoteControl() {
		onCommands = new Command[6];
		offCommands = new Command[6];

		Command noCommand = new NoCommand();
		for (int i = 0; i < 6; i++) {
			onCommands[i] = noCommand;
			offCommands[i] = noCommand;
		}
		undoCommand = noCommand;
	}

	public void setCommand(int slot, Command onCommand, Command offCommand) {
		onCommands[slot] = onCommand;
		offCommands[slot] = offCommand;
	}

	public void onButtonPushed(int slot) {
		onCommands[slot].execute();
		undoCommand = onCommands[slot];
	}

	public void offButtonPushed(int slot) {
		offCommands[slot].execute();
		undoCommand = onCommands[slot];
	}

	public void undoButtonPushed() {
		undoCommand.undo();
	}

	@Override
	public String toString() {
		StringBuffer st = new StringBuffer();
		st.append("\n-------- Remote Control-------------\n");
		for (int i = 0; i < onCommands.length; i++) {
			st.append("[slot"+ i + "\n"+ onCommands[i].getClass().getCanonicalName()+ " "
					+ "  "+ offCommands[i].getClass().getName()+"\n");
		}

		return st.toString();
	}
}
- 위와같이 On, Off Command를 6개씩 넣을 수 있는 배열을 내부변수로 가지고있고, 또한 undo를 할 수있는 command를 저장하였다.
- 또한 상태 확인을 위해 toString 객체 또한 Override 하여 만들어 주었다.
-이제 다음으로 Invoker에서 트리거 되는 command 객체를 만들어보자.
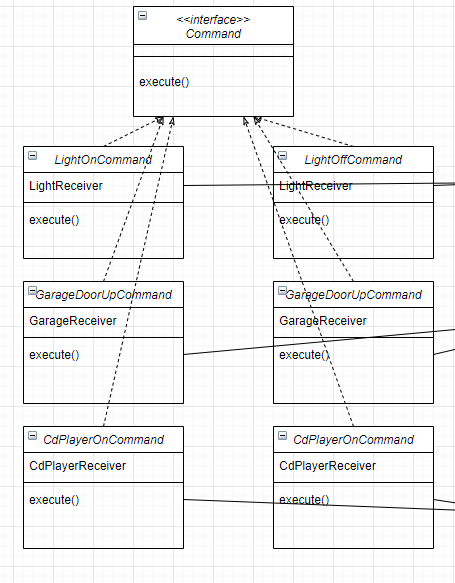
- 위와 같이 Receiver에 행동 하나하나가 그에 대응되는 Command 객체로 만들어진다.
- 많은 커맨드가 있지만 위 Command중 로직이 가장 복잡한 Cdplayer Command 만 만들어보자.
public class CdPlayerOnCommand  implements Command{
	CdPlayerReceiver cdPlayer;

	public CdPlayerOnCommand(CdPlayerReceiver cdPlayer) {
		this.cdPlayer = cdPlayer;
	}

	@Override
	public void execute() {
		cdPlayer.on();
		cdPlayer.setCd();
		cdPlayer.setVolume(11);
	}
}
public class CdPlayerOffCommand  implements Command{
	CdPlayerReceiver cdPlayer;

	public CdPlayerOffCommand(CdPlayerReceiver cdPlayer) {
		this.cdPlayer = cdPlayer;
	}

	@Override
	public void execute() {
		cdPlayer.off();
	}
}
- 위와같이 command내부 execute command 안에는 여러개의 Receiver에 로직이 들어갈 수 있다. (원하는 행동을 구동시키기 위하여)
- 다른 Command들은 충분히 쉬우니 생략하도록 하겠다.
만능리모컨 사용해보기
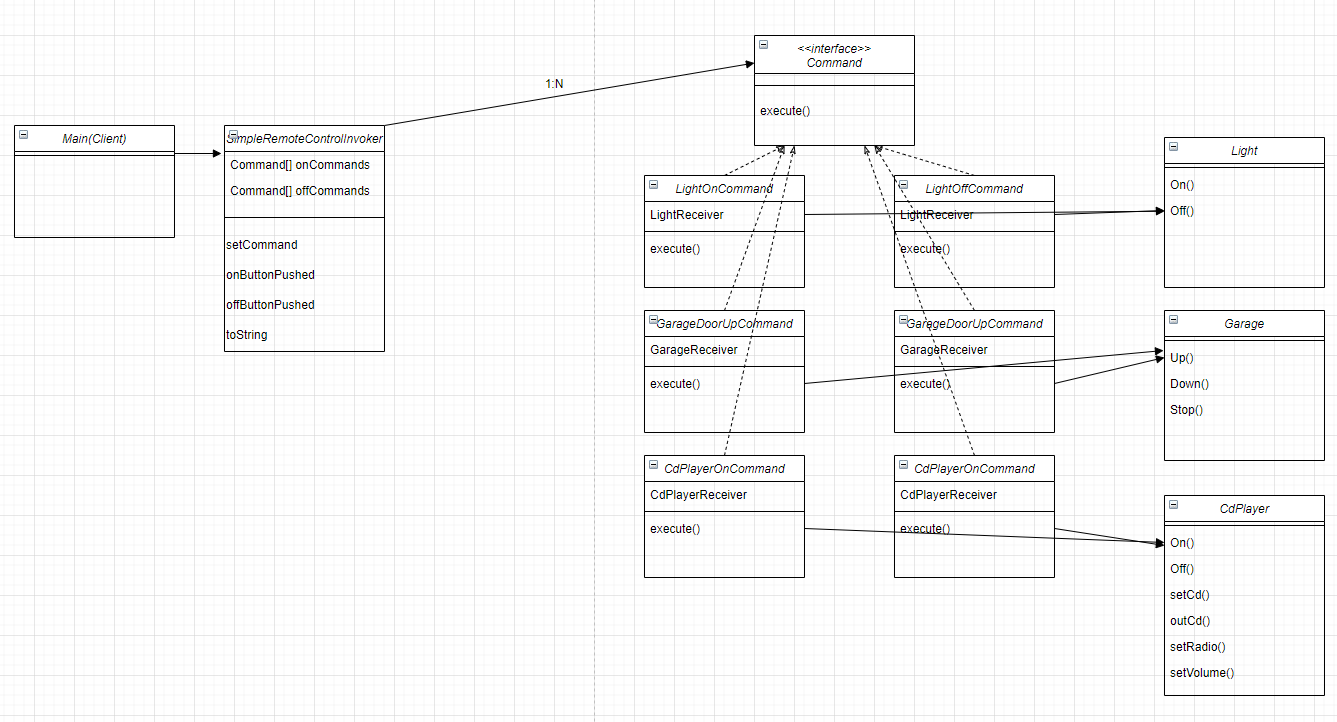
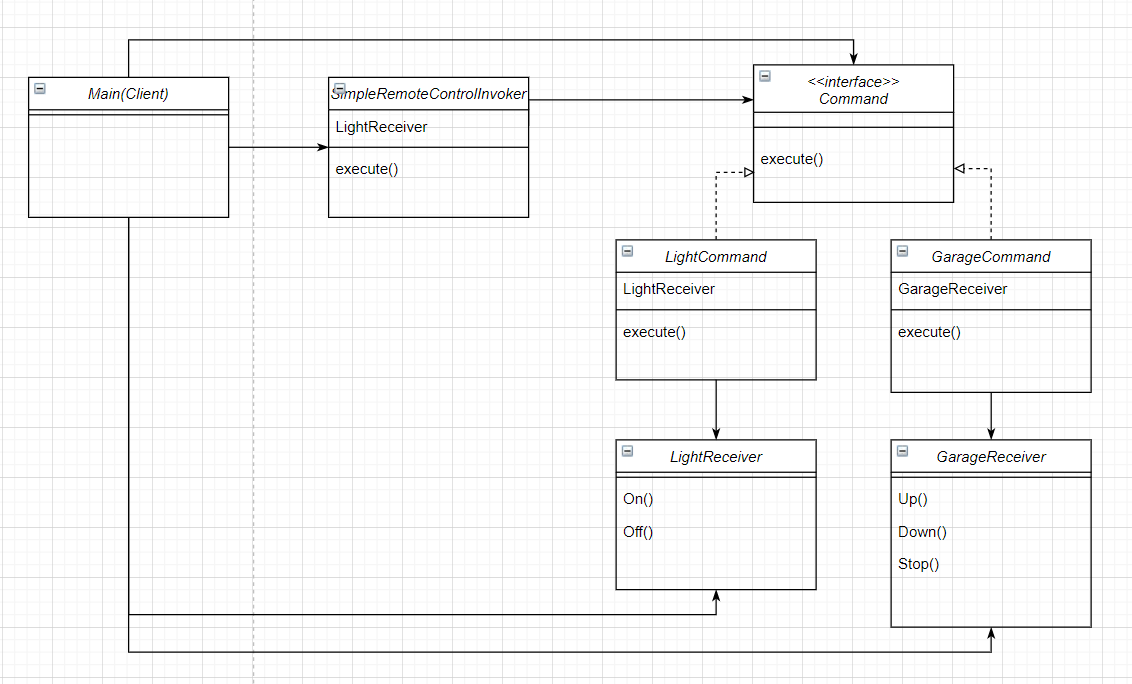
- 위와 같은 클래스다이어그램의 만능리모컨이 완성 되었다. 한번 사용해보도록하자
public class RemoteLoader {

	public static void main(String[] args) {
		RemoteControl remoteControl = new RemoteControl();

		LightReceiver lightReceiver = new LightReceiver();
		GarageDoorReceiver garageDoorReceiver = new GarageDoorReceiver();
		CdPlayerReceiver cdPlayerReceiver = new CdPlayerReceiver();

		LightonCommand lightonCommand = new LightonCommand(lightReceiver);
		LightOffCommand ligOffCommand = new LightOffCommand(lightReceiver);

		GrageDoorDownCommand garDoorDownCommand = new GrageDoorDownCommand(garageDoorReceiver);
		GarageDoorUpCommand garageDoorUpCommand = new GarageDoorUpCommand(garageDoorReceiver);

		CdPlayerOffCommand cdPlayerOffCommand = new CdPlayerOffCommand(cdPlayerReceiver);
		CdPlayerOnCommand cdPlayerOnCommand = new CdPlayerOnCommand(cdPlayerReceiver);

		remoteControl.setCommand(0, cdPlayerOnCommand, cdPlayerOffCommand);
		remoteControl.setCommand(1, garDoorDownCommand, garageDoorUpCommand);
		remoteControl.setCommand(2, lightonCommand, ligOffCommand);

		remoteControl.onButtonPushed(0);
		remoteControl.offButtonPushed(0);

		remoteControl.onButtonPushed(1);
		remoteControl.offButtonPushed(1);

		remoteControl.onButtonPushed(2);
		remoteControl.offButtonPushed(2);

		remoteControl.onButtonPushed(3);
		remoteControl.offButtonPushed(3);

	}

}
+ Undo 기능 만들기.
Undo 기능은 만들기 참 쉽다. Command 내의 On에 반대되는 기능만 추가해주면 된다.
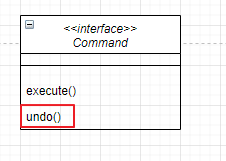
1) 다음과같이 Command interface에 Undo method만 추가해준다.
2) Cdplayer command 에서 예시로 구현해 보겠다. OnCommand에 반대되게Undo를 작성해준다.
public class CdPlayerOnCommand  implements Command{
	CdPlayerReceiver cdPlayer;

	public CdPlayerOnCommand(CdPlayerReceiver cdPlayer) {
		this.cdPlayer = cdPlayer;
	}

	//...omit...


	@Override
	public void undo() {
		cdPlayer.off();
	}

}
3) Invoker 객체에서 Undo를 포함하는 객체를 다음과같이 저장할수 있게한뒤(6개나 필요없다.) 쓸수있는 Method를 정의해준다.
public class RemoteControl {
	Command[] onCommands;
	Command[] offCommands;
	Command undoCommand;

	public RemoteControl() {
		onCommands = new Command[7];
		offCommands = new Command[7];

		Command noCommand = new NoCommand();
		for (int i = 0; i < 7; i++) {
			onCommands[i] = noCommand;
			offCommands[i] = noCommand;
		}
		undoCommand = noCommand;
	}

    public void onButtonPushed(int slot) {
		onCommands[slot].execute();
		undoCommand = onCommands[slot];
	}

	public void offButtonPushed(int slot) {
		offCommands[slot].execute();
		undoCommand = onCommands[slot];
	}

	// ... omit ...


	public void undoButtonPushed() {
		undoCommand.undo();
	}
}
- 차이가 보이는가? 커맨드가 실행될때마다 슬롯을 UndoCommand에 저장시켜서 언제나 Undo method를 실행할 수 있게준비한다.
4) 메인에서 사용방법이다.
public class RemoteLoader {

	public static void main(String[] args) {
		RemoteControl remoteControl = new RemoteControl();

		GarageDoorReceiver garageDoorReceiver = new GarageDoorReceiver();

		CdPlayerOffCommand cdPlayerOffCommand = new CdPlayerOffCommand(cdPlayerReceiver);
		CdPlayerOnCommand cdPlayerOnCommand = new CdPlayerOnCommand(cdPlayerReceiver);


		remoteControl.onButtonPushed(0);
		remoteControl.undoButtonPushed();
		remoteControl.offButtonPushed(0);

		// ... omit ....

	}

}
- 위와같이 사용할 수 있다.
'To be Developer > DesignPatterns' 카테고리의 다른 글
| 6-1.Command Pattern (Simple) (0) | 2020.01.10 |
|---|---|
| 5.Singleton Pattern (0) | 2020.01.07 |
| 4-2 Factory Pattern (Abstract Factory Pattern) (0) | 2020.01.05 |
| 4-1.Factory Pattern (Factory Method Pattern) (0) | 2020.01.04 |
| 3.Decorator Pattern (0) | 2020.01.02 |
